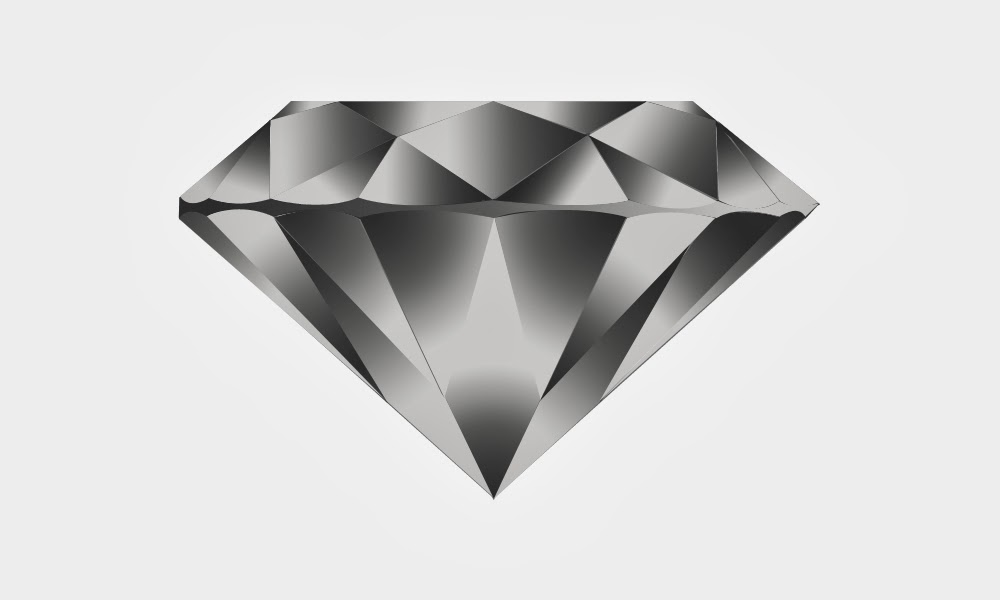
Free Tutorial and Project file: How to Design a 2D Diamond in Photoshop
Free Tutorial and Project file: How to Design a 2D Diamond in
Photoshop
To
design a logo for a jewelry store, crystal plant or any similar business,
you need to incorporate a Diamond in your logo, the diamond shape should be as
simple as possible while, at the same time, give the 3D impression.
In this tutorial I will teach you how to design a
Diamond in Photoshop, of course you can download the original file From Here in order to compare your work with the
original file.
1.
Create a brand new Photoshop file,
set the dimensions to "1000" for width, "600" for height,
resolution to "72"; of course you can change the dimensions according
to your printing preferences.
2.
Draw a simple Diamond on a paper
and picture it using any available camera you have, for me I use my mobile
camera, or simply you can download a diamond blueprint from any free images
website such as https://www.the-blueprints.com/, I made a
simple blueprint which you will find in the project file.
3.
The diamond pieces will depend on
using two colors gradients with different directions, the directions will
depend on the light reflection on the diamond surface in reality.
4.
To adjust the gradient direction,
click and drag from north to south or south to north to get the gradient going
from dark to light or from light to dark, your dragging length will affect the
colors distribution, you can try it several times until you get the effect you
wish to see.
5.
The gradient space must be
restricted to each diamond piece, this implies to make each piece or group of
pieces in a separate layer.
6.
To create a selection for each
piece, use the pen tool (press "P" to get it) and use the blueprint
as a guide for each piece border, go with your pen around the piece border
until you finish your path, right click the path and choose (make selection),
create a new layer and use the gradient tool to make necessary effect. Repeat
this step with each piece until you complete the diamond shape.
7.
Now we have created our own
diamond, we need now to get rid of the blueprint, on its layer, press the
"eye" icon in order to make this layer invisible, you will no more
see the eye neither the blueprint image, or you can make it a little bit gray
by manipulate its opacity.
8.
We need perhaps to create a nice
background for our logo, (of course this background will be use for
illustration purpose only, when you print the logo it must not be visible),
create a new layer and drag it beneath all other layers, use the gradient tool
again, but this time pick very light grays for the tow colors with slight color
variation, using gradient tool, click and drag the layer to get a simple nice
background.
9.
Of course you can adjust your
diamond shadowing properties according to your preferences, to do this you will
need to have all pieces in one layer, select all the layers we used before to
create the Diamond pieces and press (Ctrl + E) to merge them. I prefer usually
to have a copy of these layers, put them in a group and make it invisible for
further modification purposes.
10.
Now you have your diamond logo,
use any suitable font to put your company name and slogan and save your file.


Comments
Post a Comment