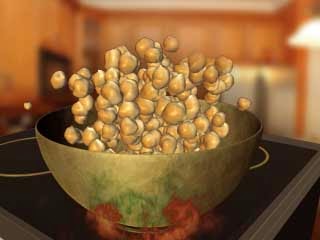
Cinema 4D: Popcorn Mograph Modeling and Animation
Cinema 4D: Popcorn
Mograph Modeling and Animation
Create a
new C4d R 12 or lower version file (10 or 11). To create the pan, from the objects menu
create a new sphere, for the type choose hemisphere. Rotate it -180 on the Y
axis. To get some thickness put it inside a Cloth NURBS. Raise the thickness to
0.8
For the
popcorns, create a new sphere, put it inside a cloner, for cloner mode choose
Grid. Count will be 6 x6 x 6. size will be 600x 600 x 600. select the cloner
object, from the MoGraph menu choose Random effector. In the Effector tab, make
the randome mode: Turbulence. In the Parameter tab set the P.X, P.Y, and P.Z to
200 cm. change the weight transform to 25.
To create
more random popcorns, you need to create an Xpresso tag. Create a new Null
object, right-click, cinema 4D tags, choose Xpresso.
Create a
PStorm, link it to a PShape, drop another sphere in it. Create a P Pass, link
it to a P Deflector, drop the Pot in the deflector. In the attribute manager
make the Deflector type (object). (you need to have initial knowledge of
Xpresso to perform this step or you can skip it). Create a P Gravity,
create another Null object and drop it in it. You will need to change the
orientation of the gravity by rotating it. Create another Null object or you
can use the first one created for the Xpresso tag. Drop it inside the Xpresso
panel, link its global position and global matrix to the P Storm Emitter
position and Emitter alignment.
From the
Simulation menu, create a Particle geometry from the Thinking Particles
submenu, in order to see your flying popcorns
Create
materials for the Popcorn and the pot. You can use any environment settings you
wish to reach the results in your mind.


Comments
Post a Comment