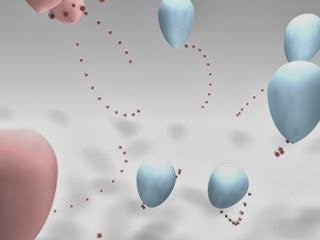
Cinema 4D: Create a group of randomly flying Balloons
Cinema 4D: Create a
group of randomly flying Balloons
Create a
new C4d R 12 or lower version file. Create a new sphere, make it editable by
pressing "C" key. In the front view, use the marquee rectangular
selection tool; make sure to uncheck the only select visible elements option.
Go to the point mode, select the lower five rows of points and drag them down.
While pressing the Alt key, deselect the first upper row and drag the rest rows
down again; repeat the action until you have only a single point drag it to get
a shape similar to the one illustrated below.
Put the
balloon inside a hyper NURB object, then put the hyper NURB inside a cloner
object. Select the cloner object, in the attribute manager, set the Mode to
"Grid Array", count (2,2,3) and size to 700 cm to all axis.
Go to the
MoGraph menu, effector submenu and drop a Random effector while selecting the
cloner object. In the effector tab set the random mode to "Noise", space
to "Global", scale to "198" and animation speed to
"10". In the Parameter tab, set the transform mode to "remap",
transform space to "object", and check the position and rotation
boxes to activate both, set your desired parameter for poison and rotation or
stick to the figures shown in the illustration below.
To create
tails to balloons, from the MoGraph menu drop a tracer object, drag the balloon
cloner and drop it inside the tracer object tab as shown below.
Create a
new Sweep NURB object, create a circle or a rectangle spline and drop it inside
the Sweep NURB and drop the tracer with it as well. Set the rectangle or circle
spline as smaller as you can to get a small tail.
Select the
tracer, in the attribute manager, object tab, set the limit to "From
end", amount to "60" or more as you wish the tail length to be,
change the type to "Akima". Manipulate the attributes of the Sweep
NURB to get the thickness you wish or you can stick to the options set in the illustration
below.
Create a
new material for the balloon, to get a changing color for balloons, in the
color tab, from the texture drop down menu, select mograph, then multi-shader. Pick
the number of colors you wish to see.
N.B. The tracer will be visible only in the view
port renderer, it will not be shown in the picture viewer unless you create a
sequence of frames to render.


Comments
Post a Comment